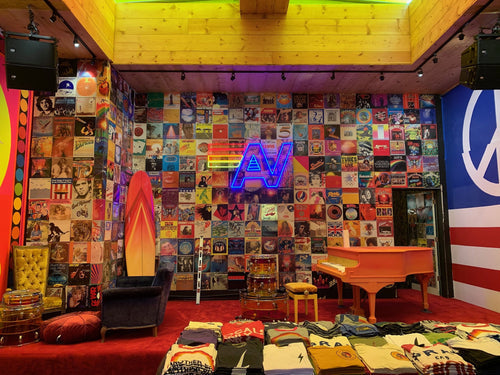
Neon signs have been an iconic form of visual communication for nearly a century. Their bright, colorful glow grabs attention, making them a popular choice for businesses, artists, and event organizers looking to create memorable and impactful displays. Despite their enduring appeal, designing and producing a high-quality neon sign is not as simple as it may appear. Many people, from business owners to designers and fabricators, often fall into common traps that result in signs that underperform, degrade quickly, or fail to meet expectations.
Mistakes such as choosing inappropriate materials for the environment, overlooking electrical load requirements, or ignoring local regulations can cause costly delays, extra expenses, or even safety hazards. Additionally, poor design decisions—like illegible fonts or incorrect sizing—can diminish the effectiveness of a sign, reducing its impact and potentially damaging a brand’s image.
Most Common Mistakes When Making Neon Signs | Pro Tips
To help you navigate these challenges, this guide will explain the most common mistakes made when making neon signs and share professional tips to avoid them.
Creating neon signs that are visually striking, durable, and functional requires careful planning and attention to detail. Whether you’re a business owner, designer, or fabricator, avoiding common mistakes is critical for success. Below, we explore the ten most frequent errors and provide actionable tips to help you get your neon sign right the first time.
Mistake 1: Choosing the Wrong Material for the Application
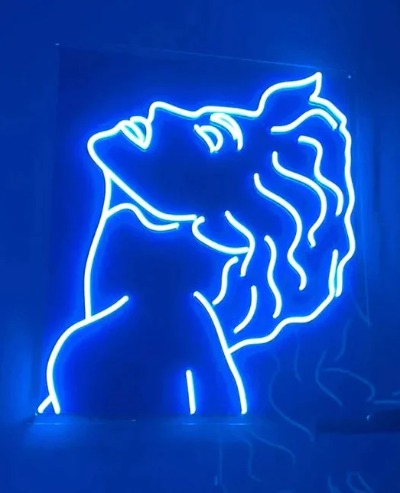
Selecting the right materials is fundamental to the longevity and performance of your neon sign. Traditional glass neon tubes are beautiful but fragile and vulnerable to environmental conditions like moisture, salt air, and temperature extremes. Using glass tubes outdoors without proper protection or weatherproofing can cause premature failure.
Alternatively, LED neon flex offers a flexible, durable, and energy-efficient solution suitable for harsh conditions. It mimics the classic neon glow without the fragility. When deciding on materials, consider:
-
Location: Indoor signs can use delicate glass, while outdoor signs benefit from LED neon flex or weatherproof glass.
-
Durability: Assess exposure to rain, sun, salt, and temperature changes.
-
Maintenance: Glass requires careful handling and occasional professional repairs; LED flex demands less upkeep.
-
Budget: Glass neon can be more expensive upfront and over time due to maintenance; LED is often more cost-effective.
Pro Tip: Match your material choice closely to the environmental demands of your installation site.
Mistake 2: Ignoring Electrical Load Requirements
Neon signs require a transformer or power supply to operate. Each sign has specific electrical demands based on tube length, gas type, and voltage. Ignoring these requirements can cause the power supply to overload, trip breakers, or shorten component life.
Always calculate the total current (amperage) your sign will draw and select a power supply with at least 20% extra capacity to avoid overheating. Undersized transformers lead to dim lights, flickering, or complete failure.
Additional electrical tips:
-
Use proper wiring with correct gauge to handle current safely.
-
Include fuses or circuit breakers as safety measures.
-
Ensure electrical components are UL-listed or comply with safety standards.
-
Consult a licensed electrician during installation for code compliance and safe wiring.
Pro Tip: Never underestimate your sign’s electrical load. Proper matching prevents downtime and hazards.
Mistake 3: Poor Design for Legibility
A neon sign’s primary function is communication. If customers can’t easily read your message, the sign fails regardless of how stylish it looks.
When designing for legibility:
-
Choose simple, bold fonts over intricate or script styles.
-
Use adequate spacing between letters to avoid crowding.
-
Avoid long or complex messages; keep text concise.
-
Consider viewing distance — letters must be large enough to be read clearly from afar.
-
Use contrasting background colors to make neon colors pop.
-
Test designs under different lighting conditions, including bright daylight and darkness.
Avoid designs that look good on a computer screen but are illegible in real life.
Pro Tip: Prioritize clarity and simplicity for maximum impact.
Mistake 4: Not Testing the Sign Before Final Installation
Skipping thorough testing is a costly mistake. Signs should be powered on and monitored for at least 30 minutes to verify all sections light evenly and maintain stable brightness.
Testing helps detect:
-
Electrical faults such as loose wiring or bad connections.
-
Dead or dim sections caused by faulty tubes or LEDs.
-
Transformer or power supply issues.
-
Flickering or unstable illumination.
A well-documented test phase allows quick fixes before shipping or installation, saving time and money.
Pro Tip: Always perform a full power test with photos or video proof before delivery.
Mistake 5: Misjudging Size and Scale
The size of your neon sign must match the intended display environment. A sign too small will fail to grab attention; a sign too large may overwhelm or look out of place.
To get sizing right:
-
Measure the installation surface carefully, considering height and width.
-
Visualize the sign on-site using cardboard cutouts or digital mockups.
-
Factor in the viewing distance — larger spaces or outdoor areas require bigger signs.
-
Account for mounting height and line of sight to ensure visibility.
Poorly sized signs can lead to additional costs and redesigns.
Pro Tip: Use physical templates or augmented reality tools to preview your sign at scale.
Mistake 6: Choosing the Wrong Color Temperature
Neon colors vary not only by gas type but also by phosphor coatings and glass colors. The “off” color of the tubing often doesn’t match the illuminated color, which can surprise clients expecting a certain hue.
When selecting colors:
-
Request illuminated samples or videos rather than relying on swatches.
-
Understand that “white” neon can appear blueish, greenish, or yellowish depending on the technology.
-
Consider ambient lighting — some colors look different under daylight versus nighttime.
-
Use complementary colors to enhance readability and aesthetic appeal.
Incorrect color choices can diminish brand consistency and visual appeal.
Pro Tip: Test actual light colors in the intended environment before finalizing.
Mistake 7: Skipping Mounting Planning
Proper mounting ensures your neon sign is secure and displayed as intended. Failing to plan mounting details can lead to damage or unsafe installations.
Key mounting considerations:
-
Identify the wall or surface type (drywall, brick, metal) to select appropriate hardware.
-
Check the weight of the sign to choose suitable anchors or brackets.
-
Confirm if wiring needs to be hidden or channeled behind walls.
-
Allow access for maintenance without dismantling major structures.
-
Use mounting diagrams from the manufacturer to guide installation.
Improper mounting risks sign failure, property damage, and safety hazards.
Pro Tip: Plan mounting details early and use hardware recommended for your specific wall material and sign weight.
Mistake 8: Underestimating Heat and Ventilation Needs
Neon signs generate heat during operation. Without adequate ventilation, this heat can build up and damage components, leading to shortened lifespan and dim lighting.
Avoid heat-related problems by:
-
Allowing 1-2 inches of clearance around the sign for air circulation.
-
Avoiding installation inside sealed enclosures or tightly enclosed spaces.
-
Providing ventilation holes or small fans if signs are enclosed.
-
Checking temperature ratings of transformers and tubing to ensure suitability.
-
Inspecting heat buildup during testing phases.
Proper ventilation preserves sign brightness and safety.
Pro Tip: Never box in your neon sign without planning airflow and heat dissipation.
Mistake 9: Not Complying with Local Codes
Every city and jurisdiction has specific rules governing signage. Non-compliance can result in fines, forced removal, or modifications.
Common regulations to check:
-
Maximum sign size and surface area allowed.
-
Restrictions on flashing, blinking, or moving lights.
-
Illuminance limits (brightness levels).
-
Placement rules (distance from streets, property lines).
-
Electrical code compliance and permits.
Failing to check codes causes delays and extra costs.
Pro Tip: Contact your local signage or building authority before ordering to confirm all rules.
Mistake 10: Assuming All Neon Sign Makers Are the Same
Choosing a neon sign manufacturer solely based on price or speed often backfires. Quality, customer service, and expertise vary widely.
To select the right maker:
-
Research customer reviews and testimonials.
-
Ask for references or portfolios of previous work.
-
Verify certifications and adherence to safety standards.
-
Confirm warranty and after-sales support policies.
-
Evaluate communication responsiveness and willingness to collaborate.
A reliable fabricator ensures quality and smooth project delivery.
Pro Tip: Invest time in vetting manufacturers to avoid costly mistakes and frustration.
Bonus Tip: Maintain Your Neon Sign Proactively
A neon sign is an investment that benefits greatly from regular upkeep. Proper maintenance can extend lifespan and keep the sign looking its best.
Maintenance steps include:
-
Cleaning with a dry, soft cloth monthly to remove dust and grime.
-
Inspecting wiring and connectors twice a year for signs of wear or corrosion.
-
Replacing dim or dead tubes promptly to prevent stress on the system.
-
Scheduling professional inspections every 1-2 years.
-
Protecting the sign from physical damage and extreme weather.
Routine care prevents unexpected failures and costly repairs.
Pro Tip: Set up a maintenance schedule and train staff on basic upkeep procedures.
Frequently Asked Questions (FAQs)
Q1: How long does a typical neon sign last?
A: Traditional glass neon signs last about 8–15 years with proper care. LED neon flex can last 50,000+ hours or more, often over 10 years depending on usage and environment.
Q2: Can I install a neon sign myself?
A: Simple LED neon flex signs can be DIY-friendly, but glass neon requires specialized skills and electrical knowledge. Professional installation is recommended for safety and compliance.
Q3: What is the cost difference between glass neon and LED neon?
A: Glass neon typically costs 20-40% more upfront and requires more maintenance. LED neon flex is usually cheaper, more energy-efficient, and longer-lasting.
Q4: Are neon signs energy efficient?
A: Traditional neon consumes more power than LED neon flex. LED neon uses 80-90% less energy, reducing electricity costs.
Q5: How do I protect my neon sign from damage?
A: Avoid physical impacts, install in sheltered locations if possible, keep away from moisture and extreme heat, and schedule regular maintenance.
Final Thoughts
Creating an effective and long-lasting neon sign requires careful attention to detail throughout every stage—from selecting the right materials and planning electrical needs to designing for legibility and ensuring proper installation. Avoiding common mistakes such as choosing unsuitable materials, neglecting electrical requirements, or ignoring local codes can save you significant time, money, and hassle.
Each step, including testing the sign before final installation and planning for mounting and ventilation, is crucial to the sign’s performance and durability. Partnering with an experienced manufacturer and committing to regular maintenance will further protect your investment and extend the lifespan of your neon sign.
By following the practical advice outlined in this guide, you can avoid costly errors and create a neon sign that attracts attention, reinforces your brand, and remains reliable and visually appealing for years. Neon signs continue to be a powerful tool for business visibility, and with the right approach, you can make sure your sign works efficiently and effectively.